Detailed instructions for creating an API key and secret key on the Binance exchange for trading futures.
To create an API key, you need to create an account on the Binance exchange. If you already have an account on the Binance exchange and you need to create an API key, then skip to STEP 2
Step 1.
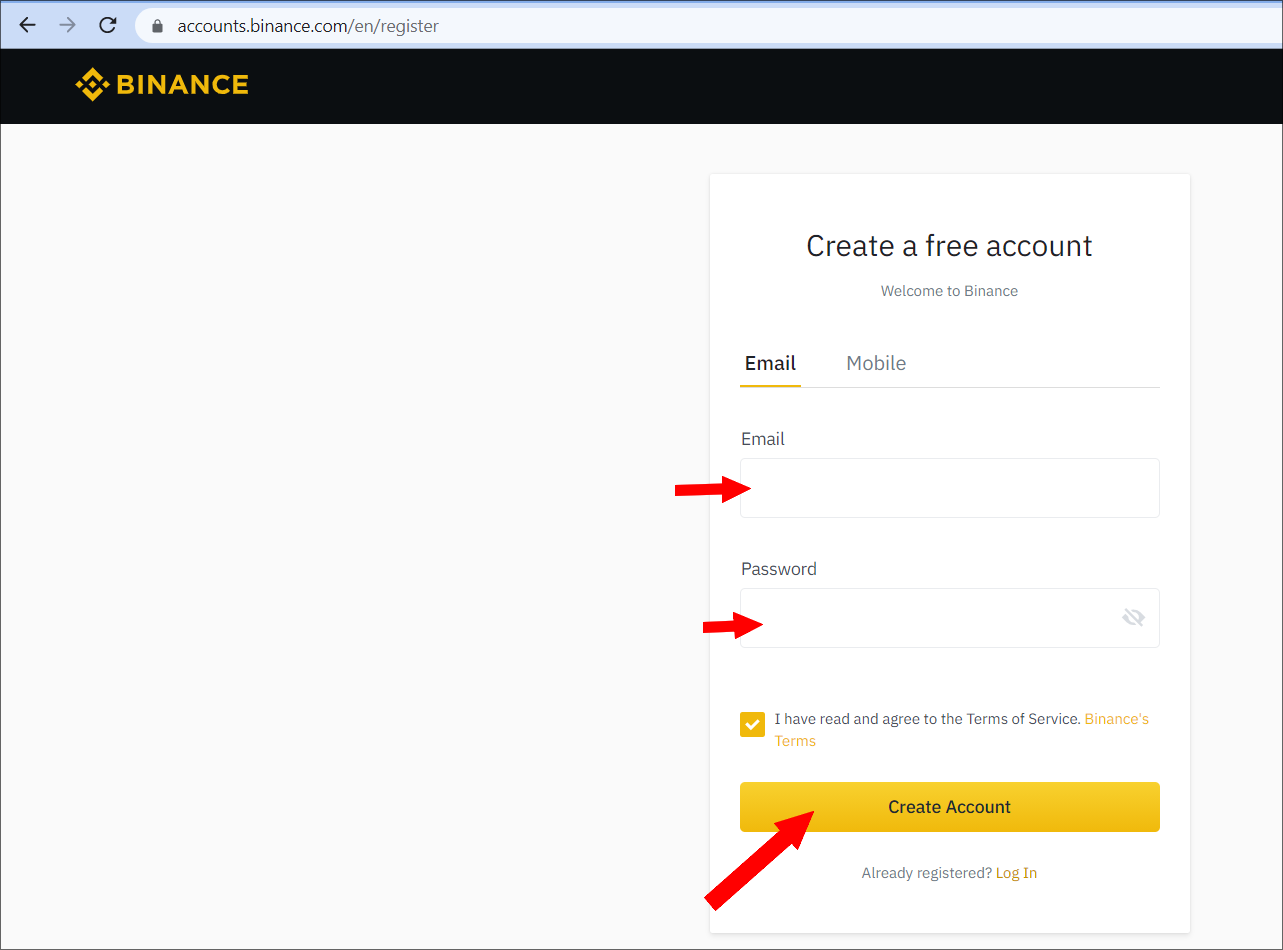
f you are a new user, please click hereto register and create an account on Binance exchange. You can copy a link and paste it to your browser, or just click on it: https://accounts.binance.com/en/register
You will see the page that prompt you to Create a free account. Please enter requested information such as your email, create a password, check the box that you agree with the Binance terms and then click on the Create accountbutton, see the screenshot below
When registering, Binance has SPAM protection. Therefore, to complete the registration, Binance will ask you to move the puzzle in the right spot. See the screenshot below
You will see a message on the screen asking you to Confirm your email address, see the screenshot below
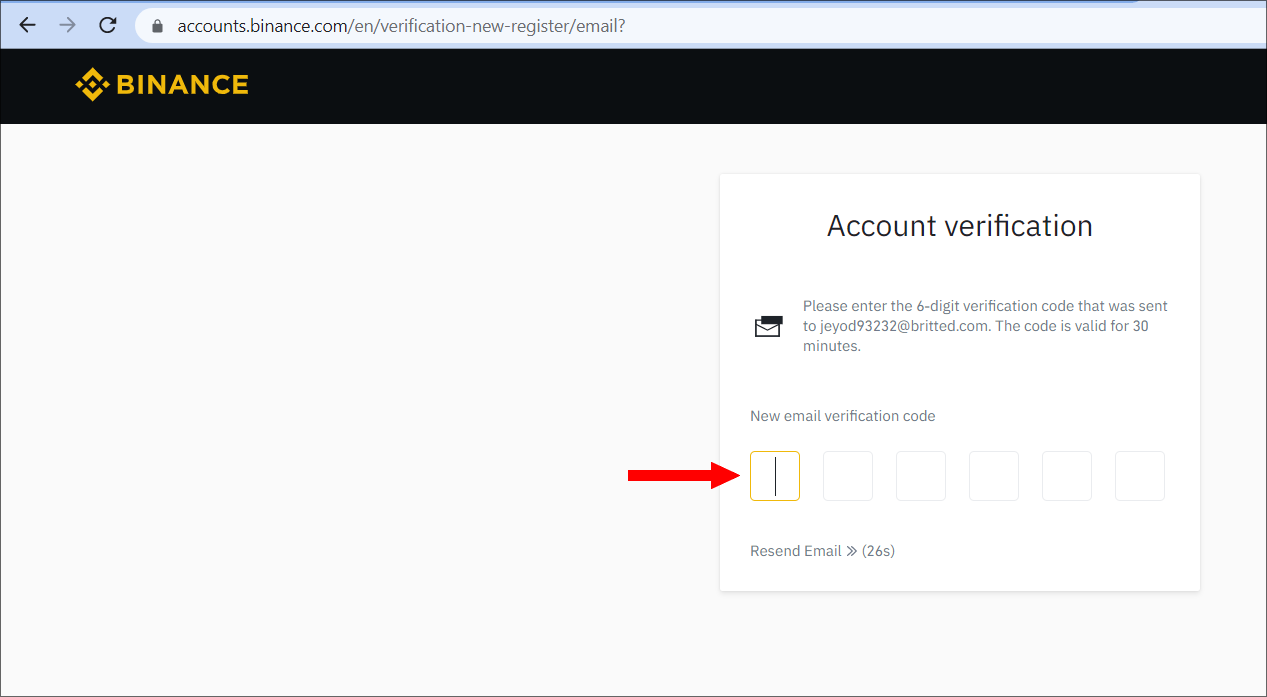
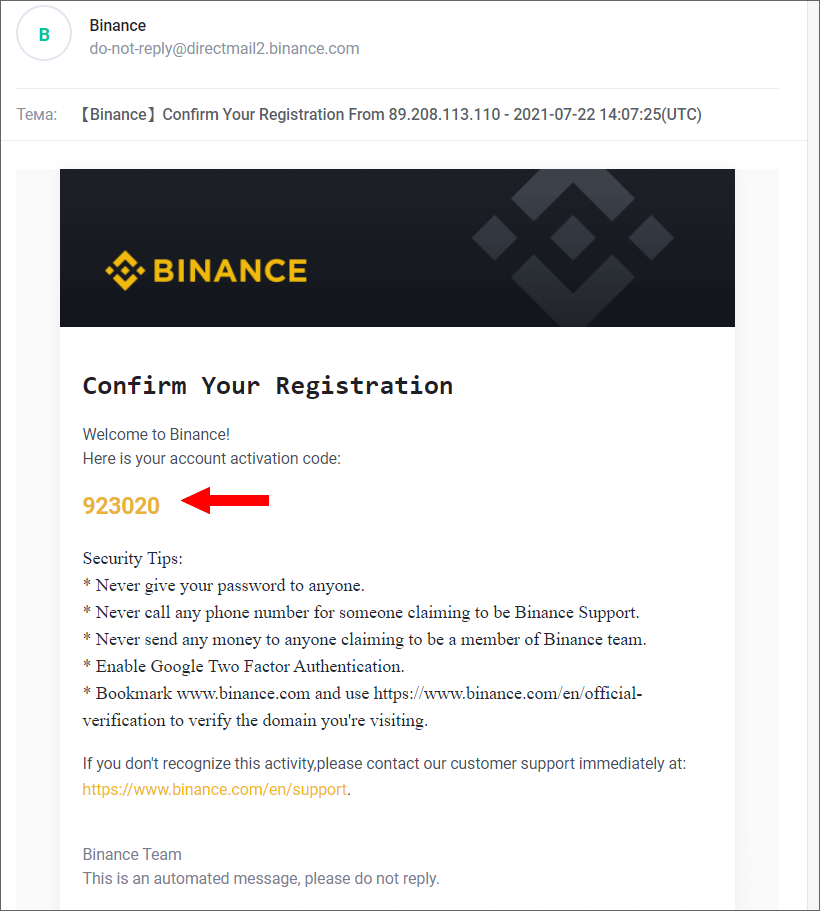
Login to your email inbox, find a letter from Binance. You will see the code that need to be entered in the confirmation page, see the picture above.
The letter with the code is shown in the screenshot below
Next is my profile Dashboard, look screenshot below
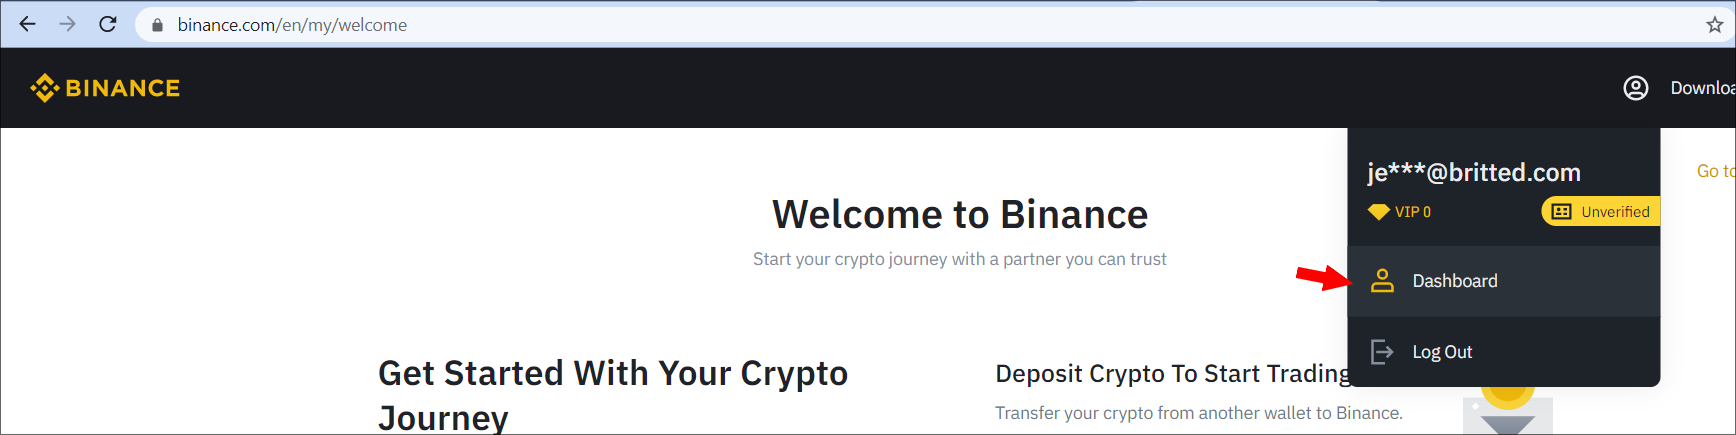
After entering the correct code, your Binance exchange account will be activated and the system will display a message in which it will recommend to enable 2FA (two-factor authentication), see the screenshot below
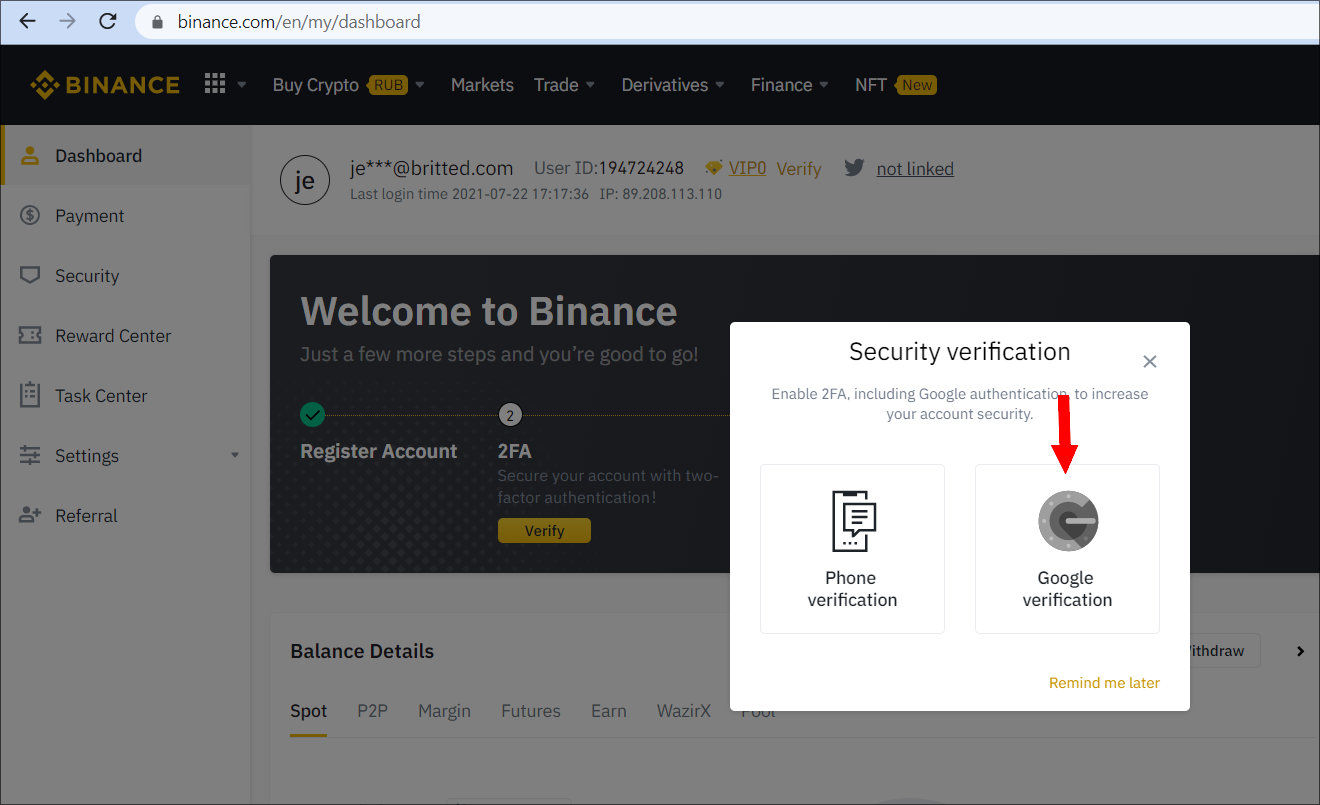
To improve the security of your exchange account on Binance, we recommend that you enable 2FA via Google Authentication or SMS Authentication.
Google Authenticationworks through the Google Authenticator application, which is installed on your phone and generates new codes every 30 seconds that need to be entered during login into your account in addition to the login and password. 2FA Google Authentication is an additional protection against hacking of your exchange account. When installing 2FA Google Authentication, MAKE SURE you are saving the authenticator code, it is a set of letters and numbers, store it as a code and qr code in a safe place. If for some reason you changed, lose, or sell your phone or deleted the Google Authenticator application from your phone, then you can always restore access to your exchange account on Bitmex through the Google Authenticator application with the authenticator code. But if you lose your authenticator code, then it will be more difficult to regain access to your exchange account, because you will have to contact support and ask them to disable 2FA Google authentication to logging into your account. Disabling 2FA Google authentication through the support service is not a quick procedure and it requires full verification where the exchange will ask you additional questions related to your account, including your transactions on tyour account!
SMS authentication - you will receive an SMS on your phone with the code when you will perform any actions on Binance, for example, creating an API key or logging into an exchange account.
Step 2.
After enabling 2 FA security on your Binance exchange account, you need to verify your identity. To do this, in the menu in your profile, select Identification and then click the Verify Nowbutton, see the screenshot below
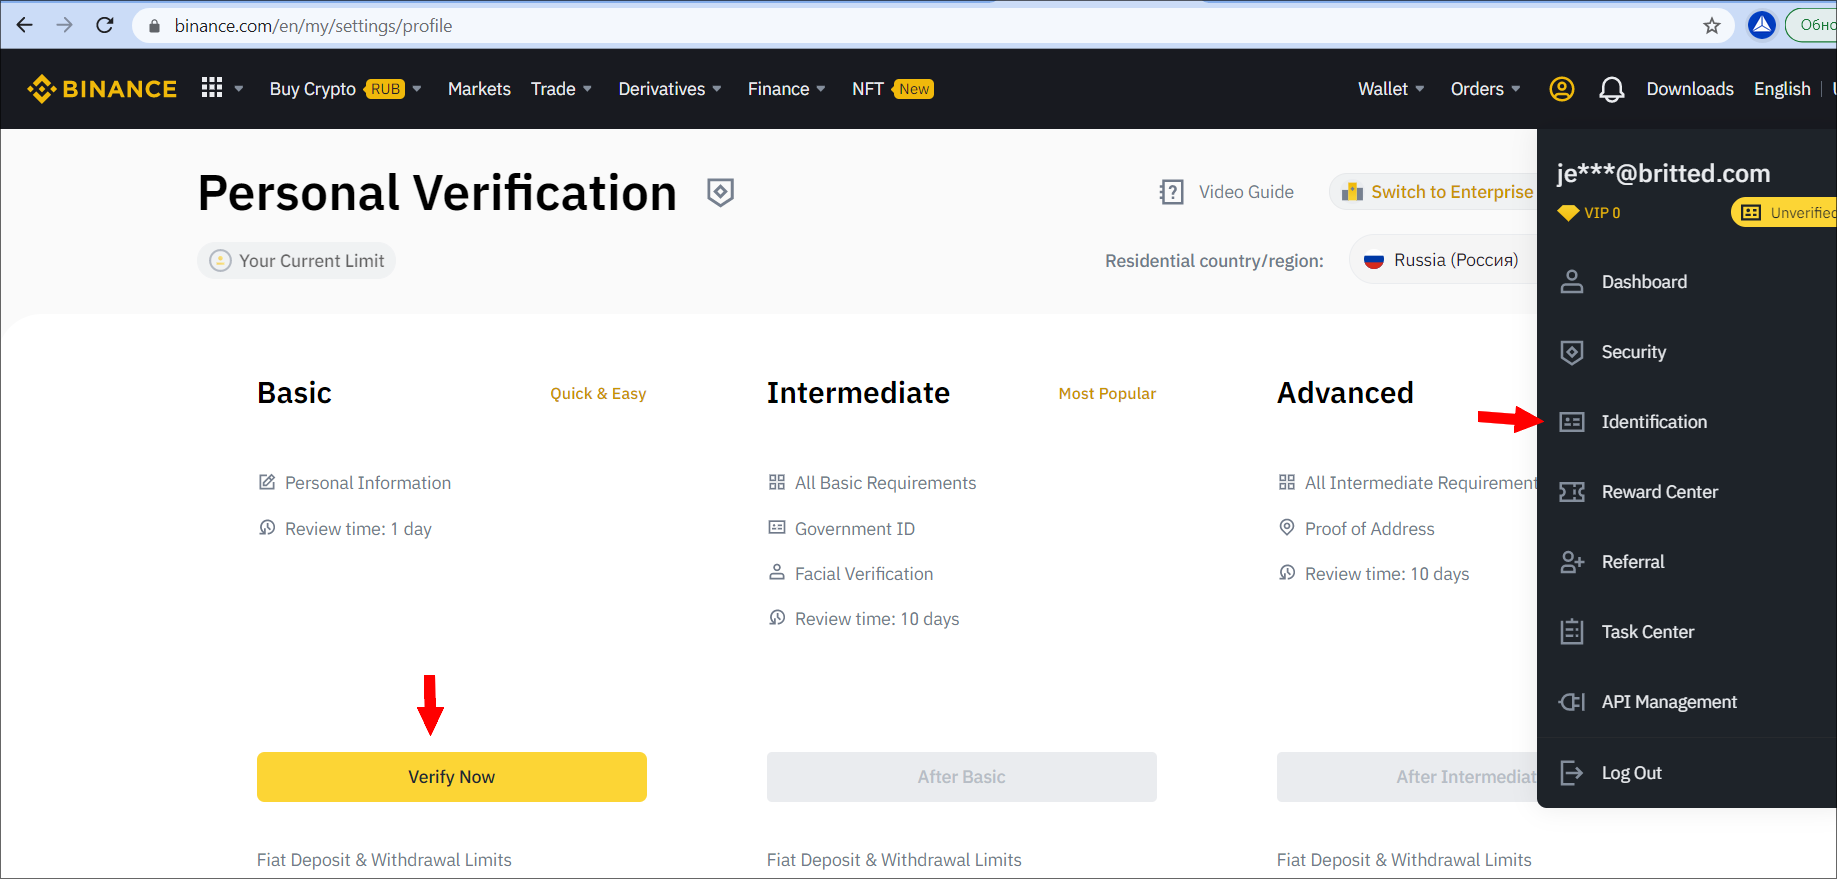
Here is the direct link to initiate Identification process: https://www.binance.com/en/my/settings/profile
After you click on the Confirm Now button, a form will now open in which you need to enter your data (First Name, Last Name, Patronymic name) and click on the Continue button, see the screenshot below
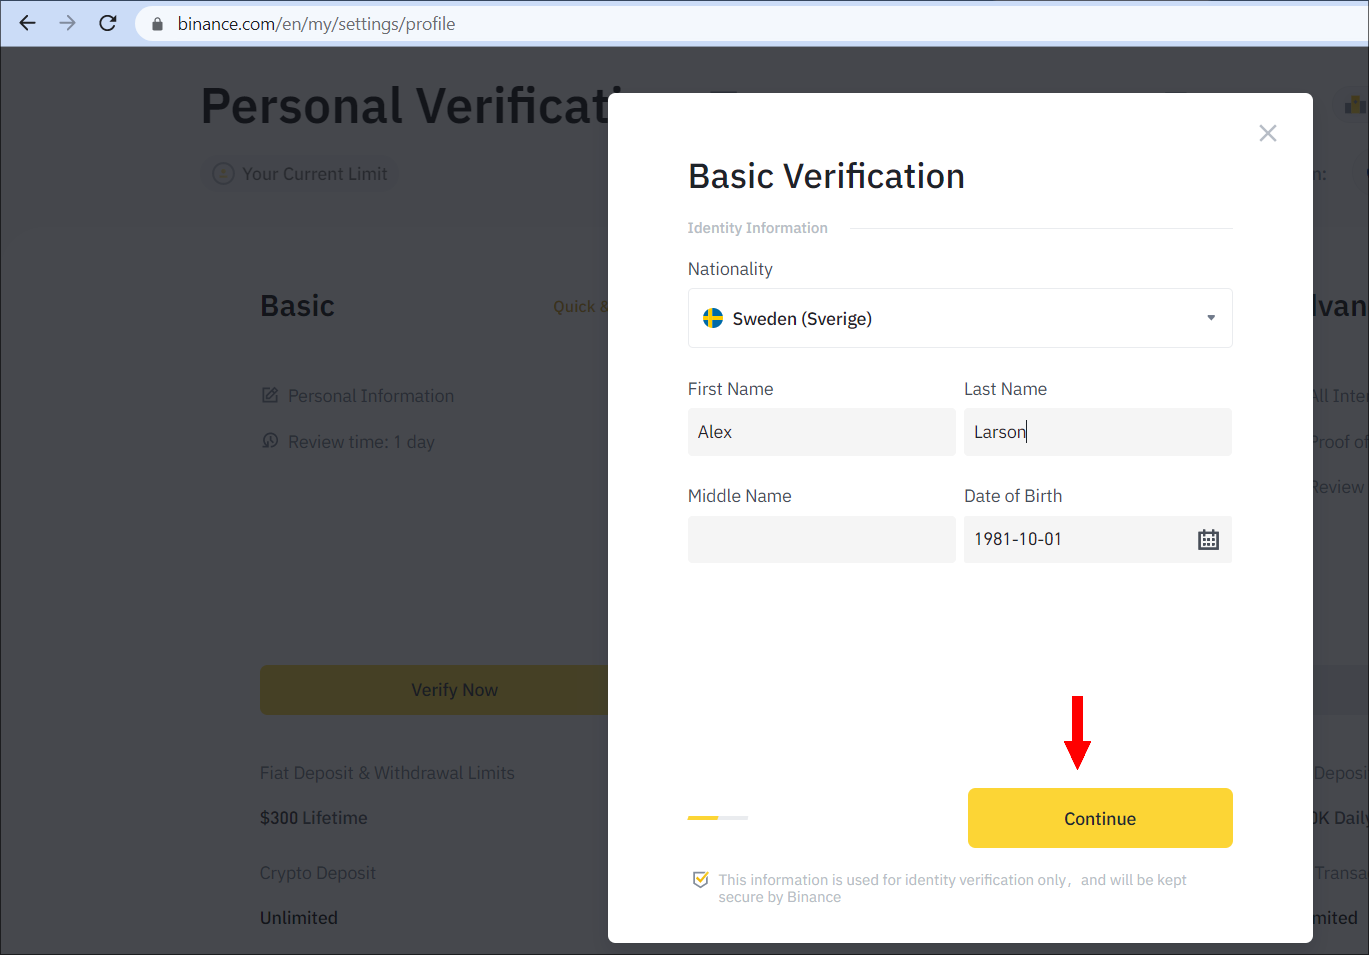
After that, your exchange account on Binance will be verified
Step 3.
After verification, you will need to create a futures wallet on your exchange account.
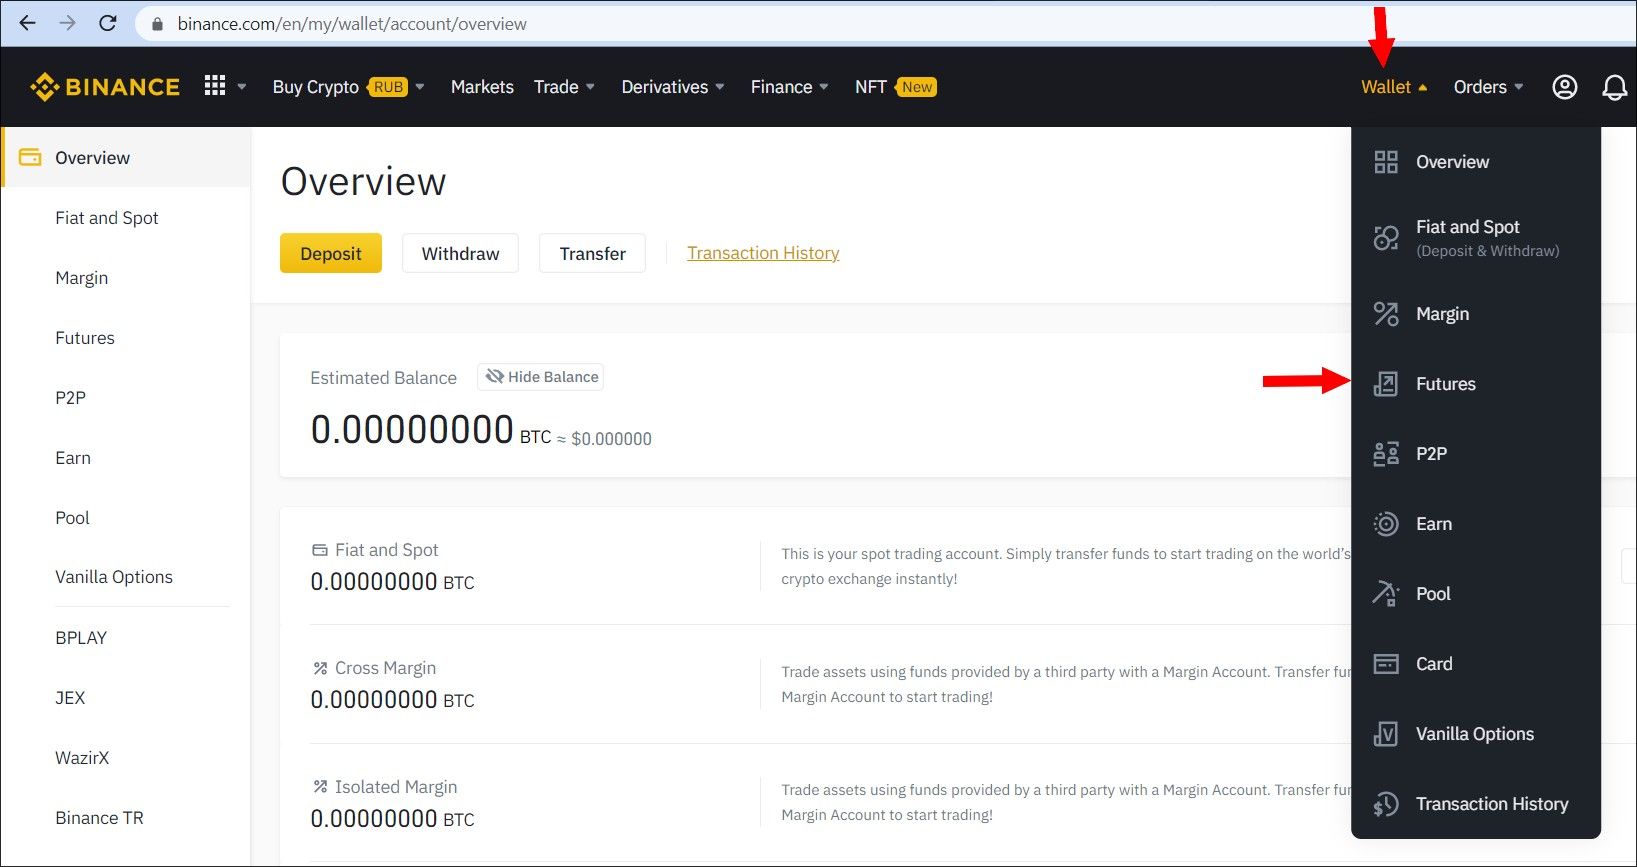
To create a futures wallet, select Wallet in the top menu and then click on Futures wallet
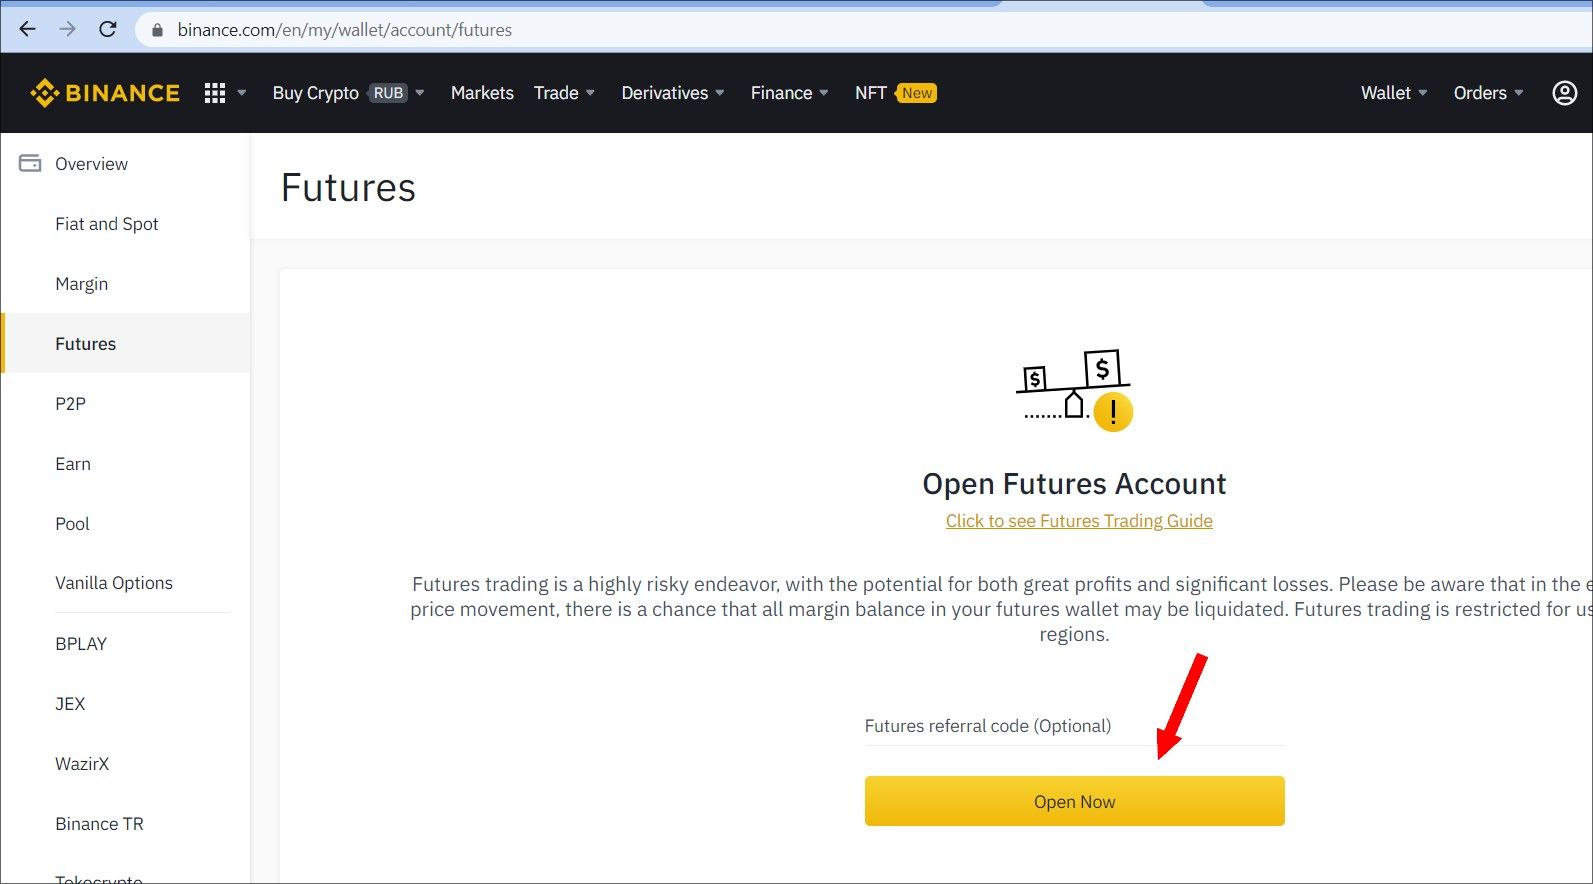
Next, in the page that opens, click the Open Now button
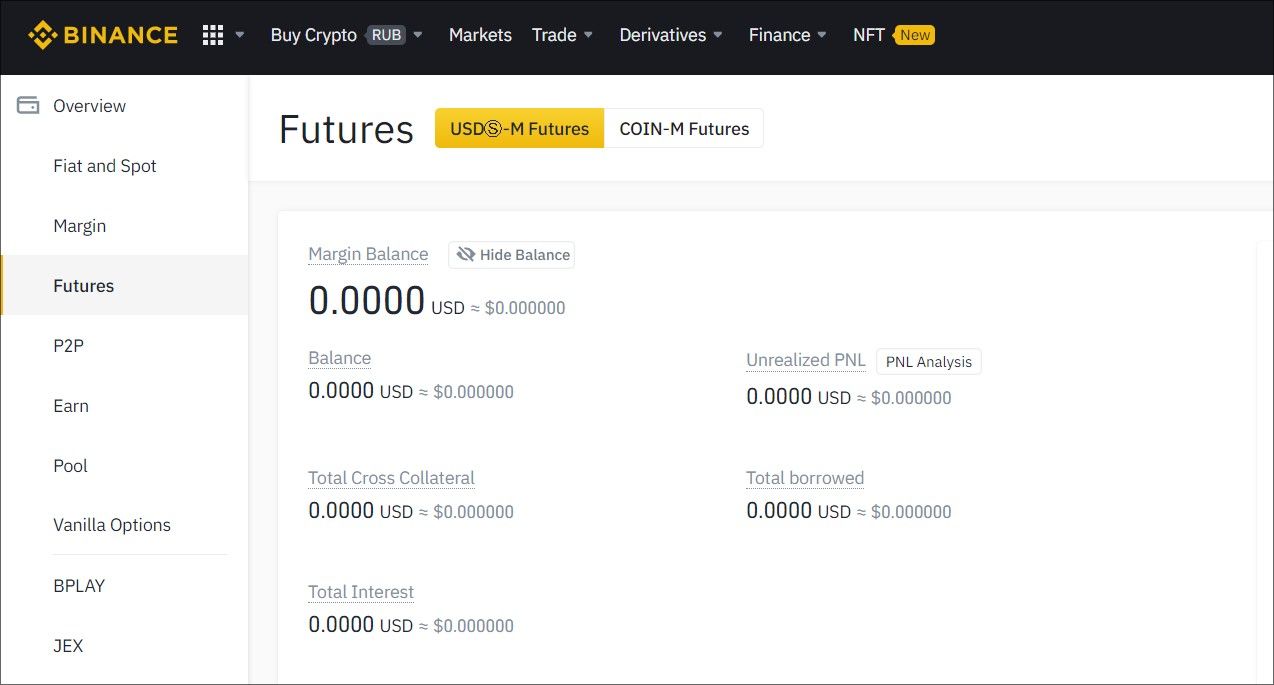
Your futures wallet page will open.
Step 4.
After creating your futures wallet, you can create an API key and a secret key in order to add your account on AIVIA platform. This account will be used to follow traders or trading bots.
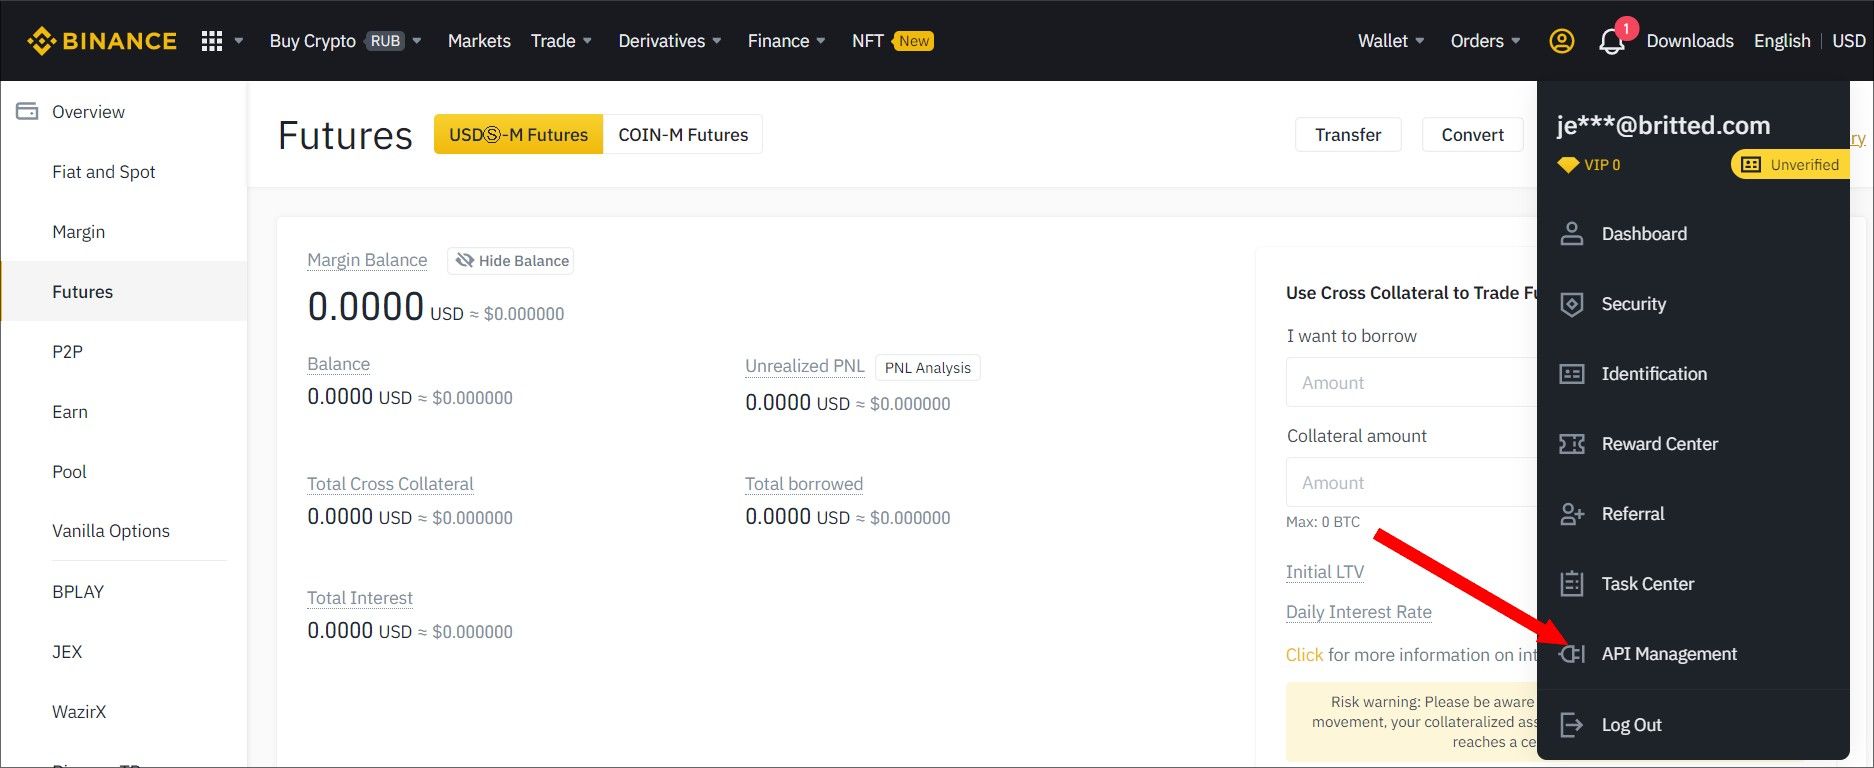
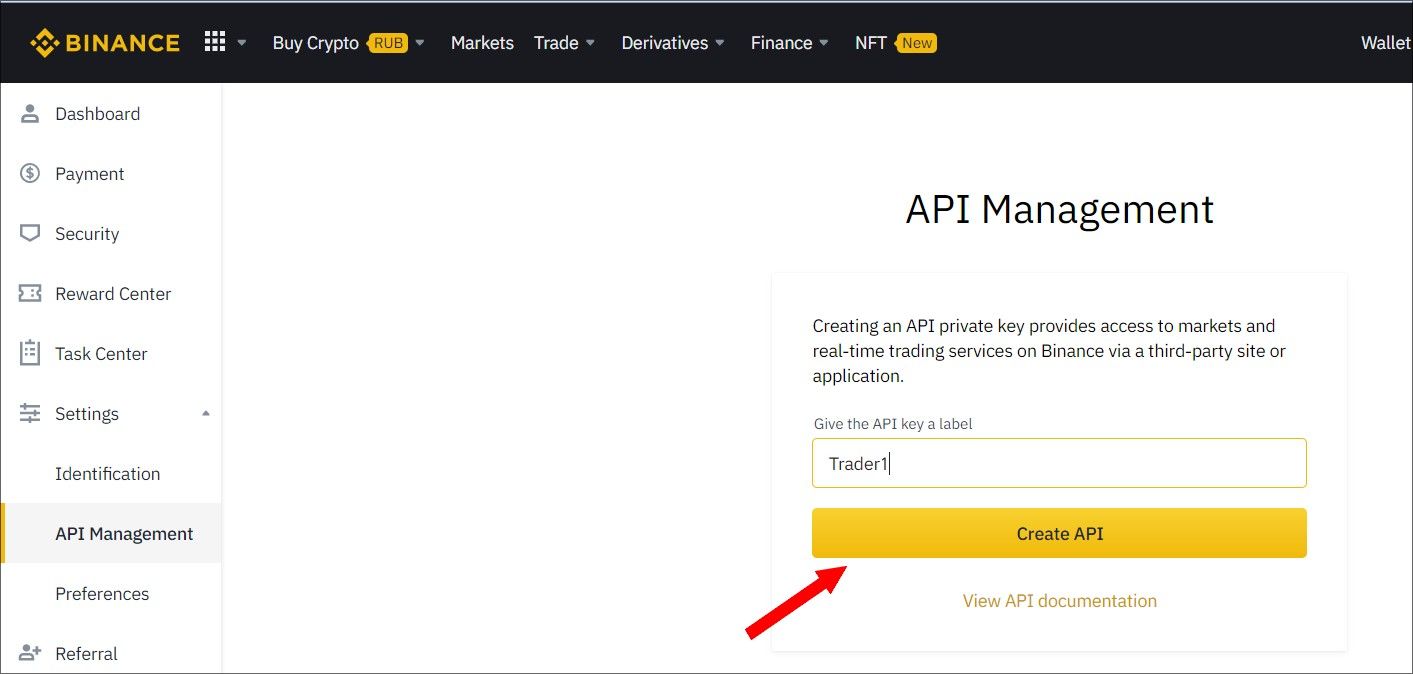
To create an API key, click on your profile in the top menu (2 letters), a submenu opens. Click on API Settings, see the screenshot below
A window will open where you will be prompted to assign a nickname to the API key and click the Create button, see the screenshot below
After clicking the Create button, system will prompt you to go thru Authentication again
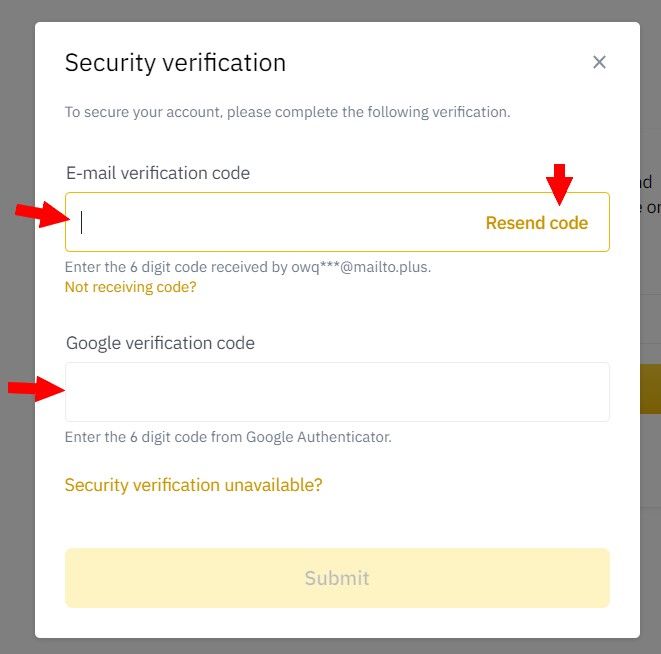
By clicking Send SMS, you will receive a code on your email, which you will need to enter in this window, see the screenshot above. After entering the code, the following window will open, where you will be asked to verify your email address and confirm that you have generated API key
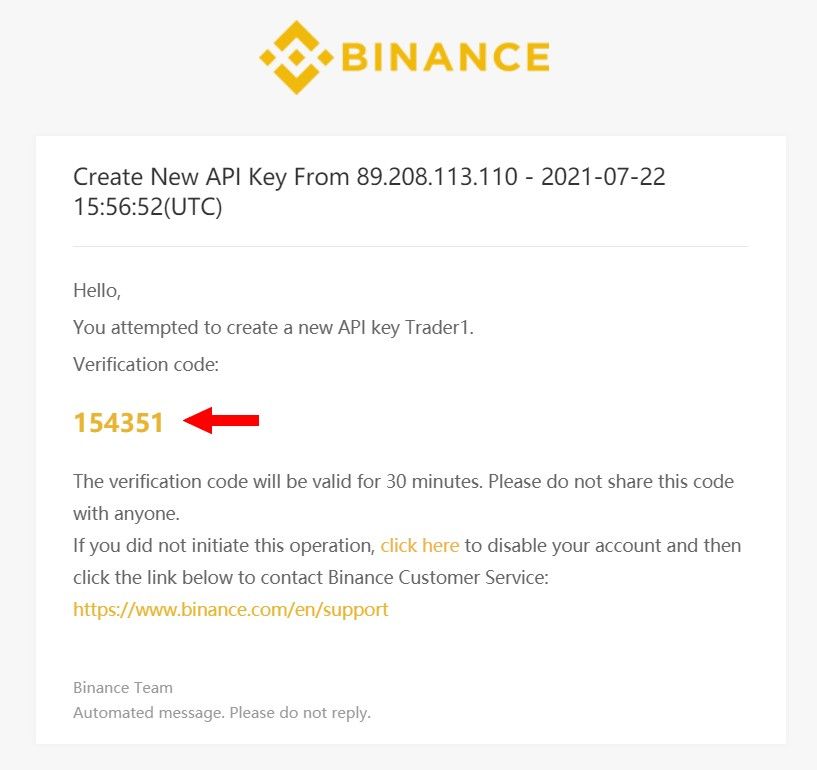
You will receive an email from Binance asking you to Confirm your new API key.
The next page will open and you will see that your API was created for your Futures Trading account, see the screenshot below
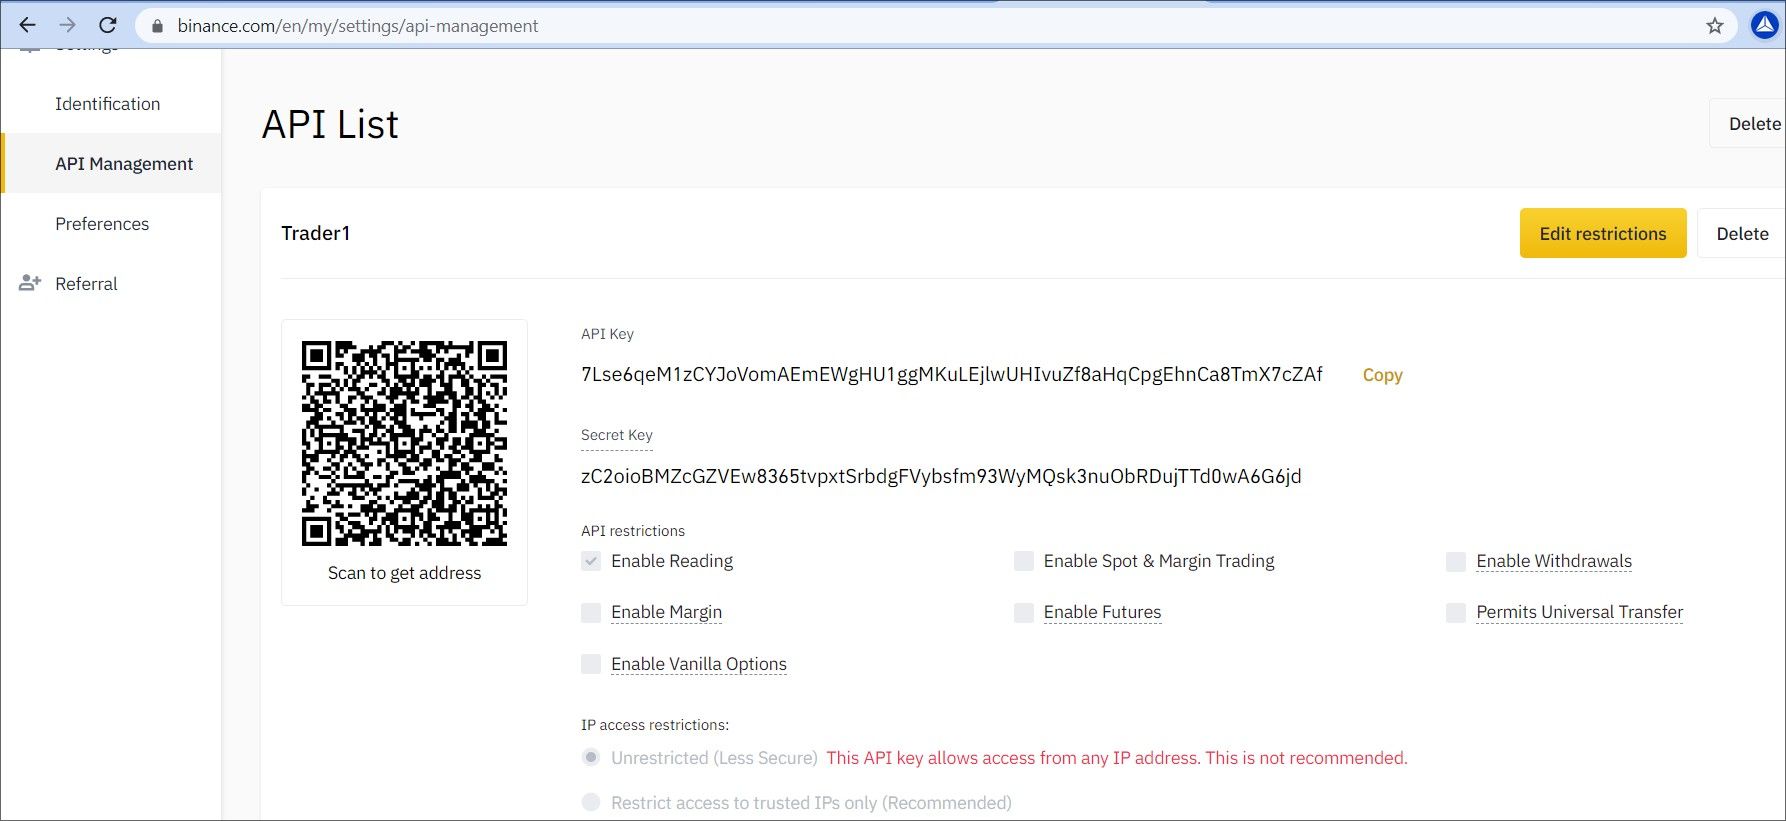
Copy the API and secret key and paste these keys in your account on the AIVIA platform.
Next, you need to go to the API setting and click on the Edit Restrictions button
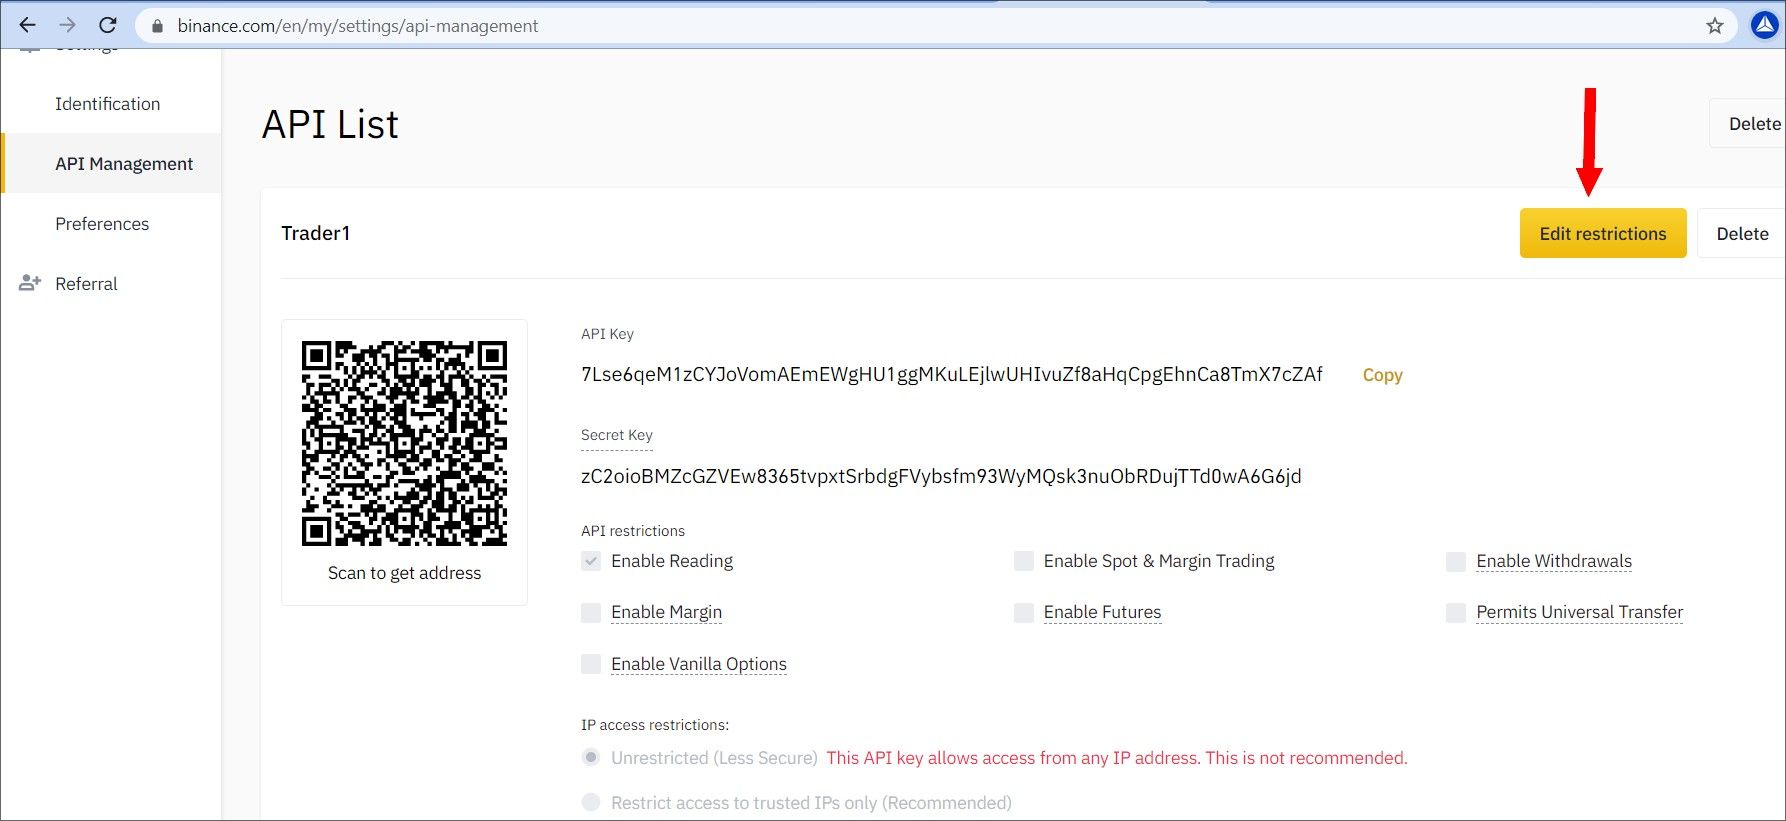
In API restriction settings, make sure to check the box Enable Futures and click on the Save button

DO NOT CHECK THE BOX Enable Withdrawals!
Please Note! Before clicking the save button, copy the API and the Secret key. After clicking the Save button, the secret key will no longer be displayed
When saving the API key, Binance will ask you to confirm by completing another Authentication step.
How to fund a Binance futures account?
To link the copy trading system to your Binance account, you must have a minimum balance of 500 USDT in your futures account. In order to fund your Binance futures account, you must have USDT in your spot Binance account.
You can fund your spot Binance Account using almost any cryptocurrency and fiat.
When you have sufficient USDT amount in the spot account, go to the Futures account and click the Transfer button, see the screenshot below
After clicking on the Transfer, you will see a window where you need to enter the amount and click on the Confirm button, see the screenshot
Please note that you are transferring from your Spot Wallet to USDⓈ-M Futures.
After confirmation, USDT balance will show in your Futures account
Please note! Your AIVIA platform account will display the balance only from your Binance futures account that was verified by the exchange.
Follow us:
https://www.facebook.com/aivia.io
https://twitter.com/aivia_io